The easiest way to use Zoom for recording professional video podcasts

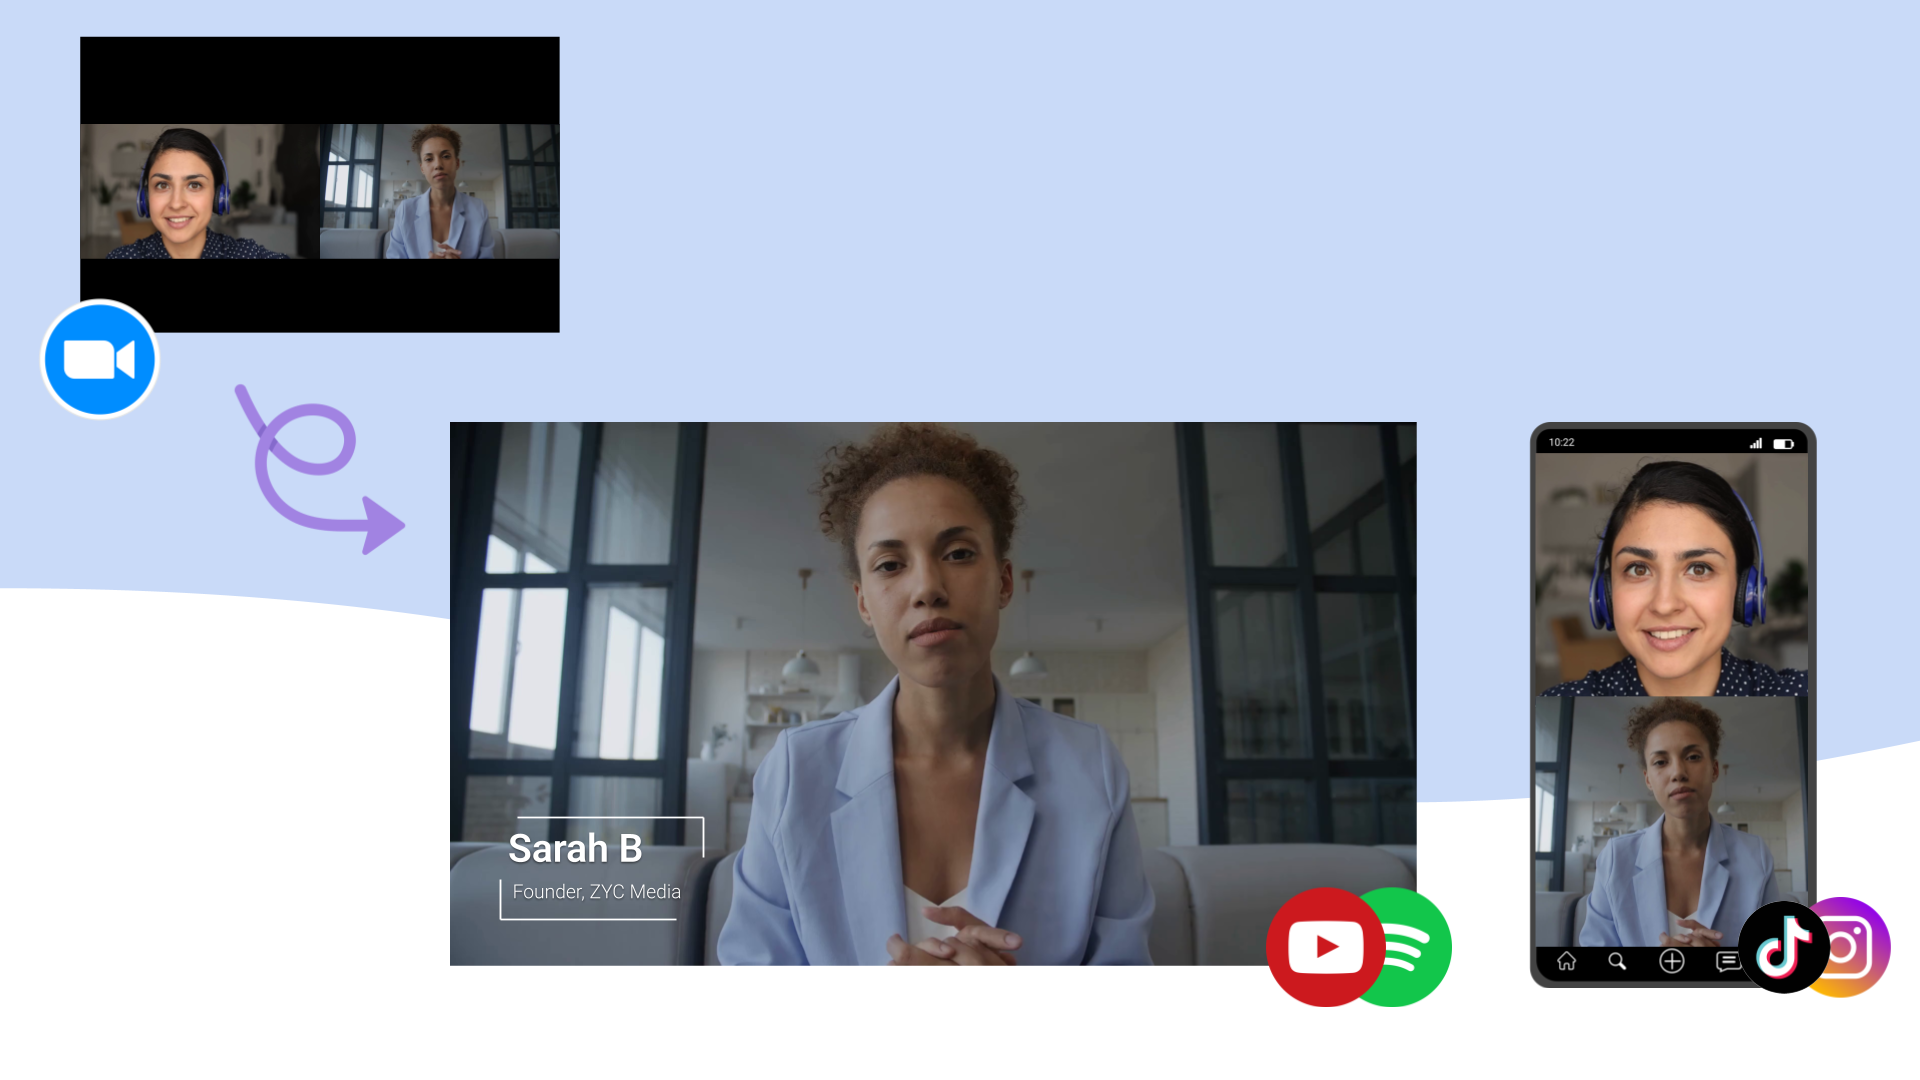
TLDR: You can use Zoom for recording high quality profesional video podcasts if you know how to use it properly. This guide covers everything from recording setup to publishing, including how Katana solves Zoom's limitations by extracting individual video tracks from a zoom recording and upscaling the video quality.
Table of Contents
Why use Zoom for Video Podcasting?
If you talk to any video editor, or podcasting industry expert, they'll adamantly tell you that Zoom was not designed for video podcasts. Part of that is true, Zoom wasn't designed for video podcasting and it does have some limitations like lower quality video and audio and returning a single video file, but part of it is also because Zoom alternatives like Riverside and Squadcast (Descript) also sponsor industry experts, so much of the industry has a vested interest in telling you that Zoom is not the best tool for the job.
And yet the majority of video podcasts are still recorded on Zoom, and having talked to many Zoom podcasters, here are a few of the reasons I've heard:
Everyone already has Zoom installed
Almost everyone already has Zoom installed and knows how to use it. When you're trying to coordinate with busy guests across different time zones, the last thing you want is to spend 15 minutes walking them through a new platform.
Zoom is already approved by IT
Many podcasters are actually doing podcasts for their company, and many companies have IT policies regarding what software can be used on company computers. Zoom is already approved by virtually every corporate IT department, while niche podcasting tools often aren't.
Reliability and Stability
If you dig around for reviews of Riverside, you'll find a lot of complaints about stability issues and audio/video sync issues. I used to work as the head of AI at Streamyard (another video podcasting platform), and to be fair to video podcasting platforms, building stable video recording software is hard, but that is also one of the reasons why many people use Zoom - it just works
The traditional challenges of using Zoom for video podcasts
Of course, Zoom wasn't designed specifically for podcast production, which creates some unique challenges, though as we'lll see later, software like Katana directly addresses these limitations
Challenge #1: Zoom recordings are ugly
Without editing, Zoom recordings are ugly. If a user is scrolling through YouTube, most will likely scroll past a video with the familiar black box
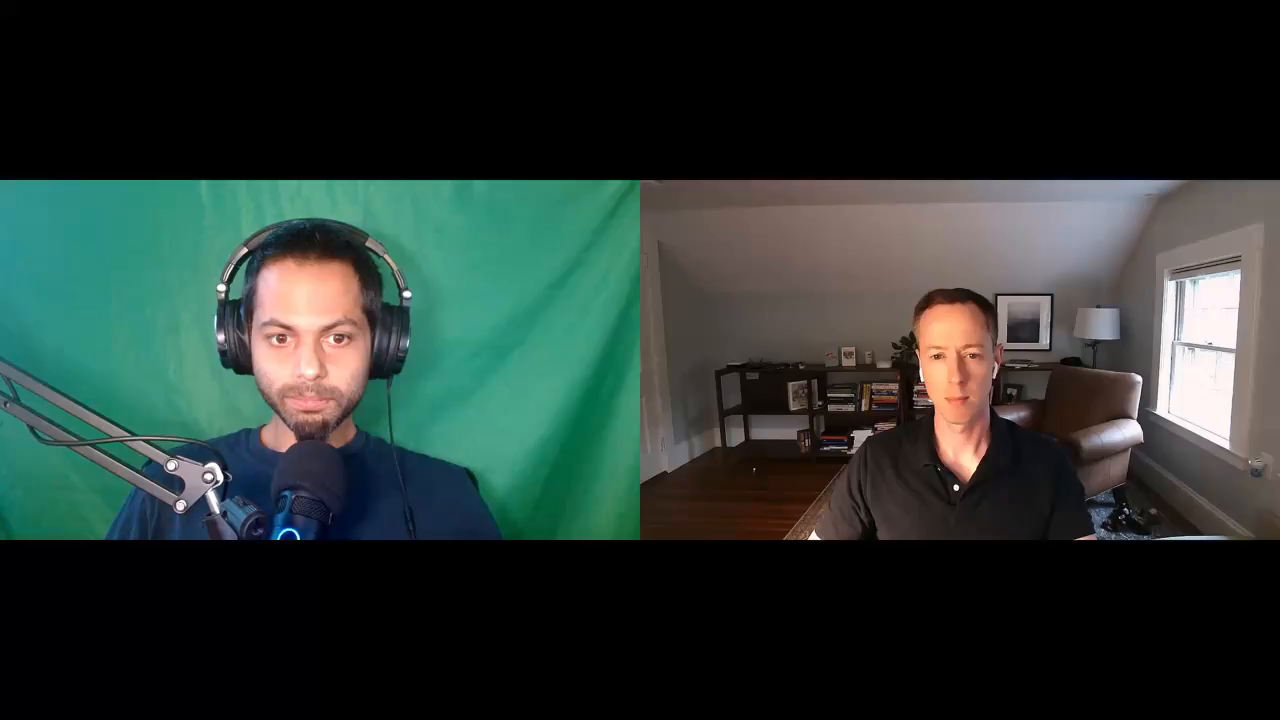
Many podcasters coming to video for the first time many not appreciate how important thumbnails and grabbing viewer's attention in the first few seconds is, and without any post-production improvements, most people will skip a video with the familiar black box
Challenge #2: Single Video File Output
Unlike dedicated podcast platforms, Zoom combines all participants into a single video file. This makes it nearly impossible to create professional-looking multi-camera layouts or adjust individual participants' framing, lighting, or audio levels in post-production.
Challenge #3: Audio and Video quality
Zoom prioritizes real-time communication over recording quality, and so invidiual videos are compressed and lower quality than what you'd get from dedicated recording setups.
Setting Up Zoom for Podcast Recording
Let's walk through the optimal Zoom configuration for podcast recording. These settings will give you the best possible raw material to work with in post-production.
Step 1: Zoom Account Setup
If you don't already have a Zoom account, sign up at zoom.com. You can start with a free account, just keep in mind that the free account has a 40 minute limit on meetings.
If you do sign up for the pro account ($14.99/month), you'll get:
- • Unlimited meeting duration
- • Cloud recording options
- • Advanced recording settings
Step 2: Essential Recording Settings
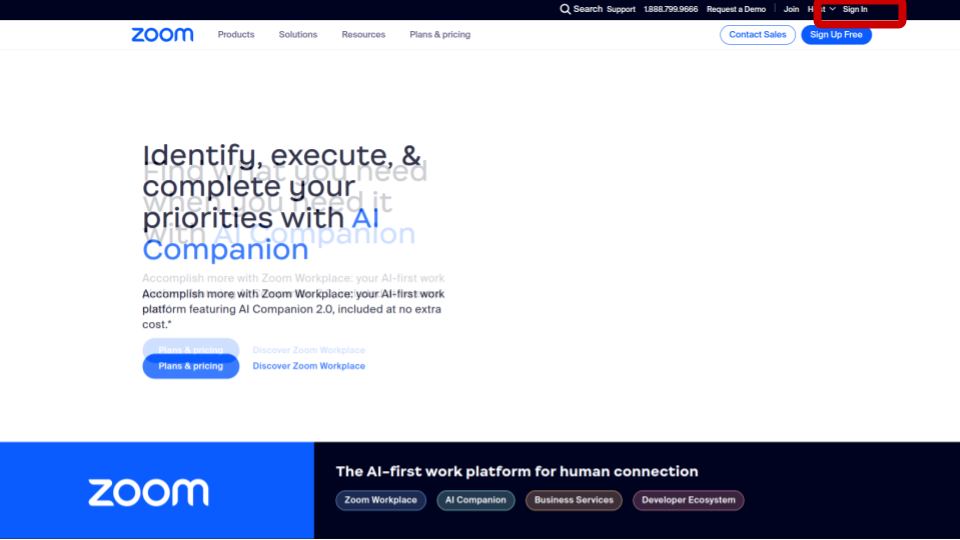
Before you have your first recording, you'll want to go to zoom.com and click "Sign in" in the top right corner to get to the settings page
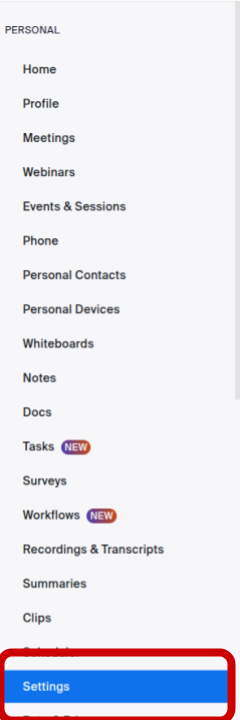
You can find the settings section on the bottom of the menu on the left hand side of the zoom web portal
Click on the "Recording" tab on the horizontal menu bar that shows up after clicking "Settings" on the left hand side

Scroll down and adjust the following settings:
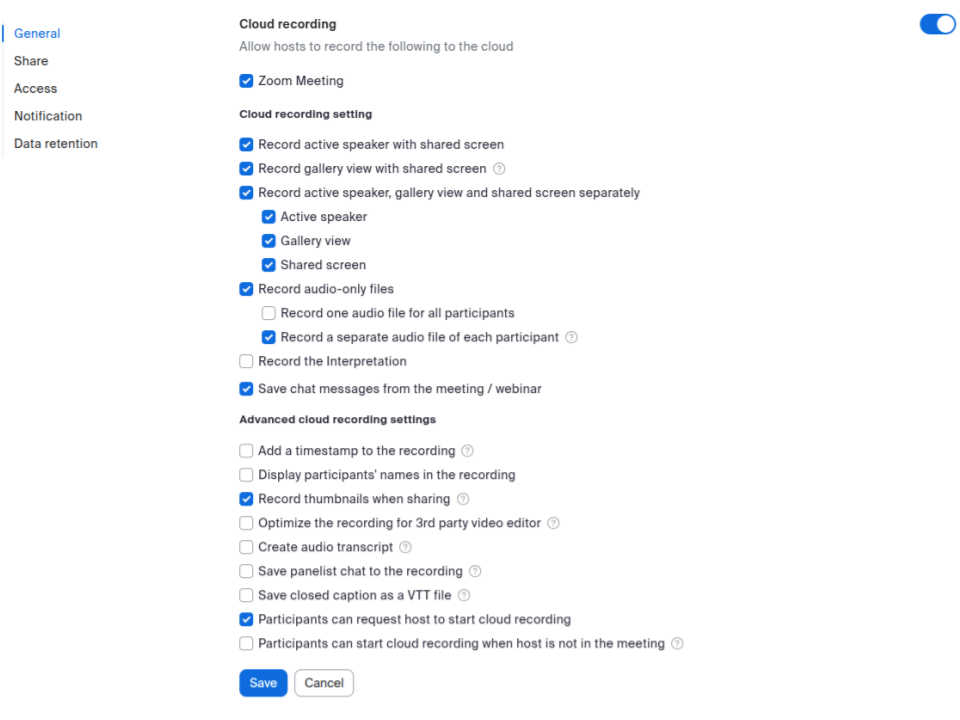
Click save, and you're all set for recording!
Don't forget to download the Zoom app on your computer (zoom.us/download), and make sure you have a working microphone and camera setup.
Equipment and Environment
If you're just starting out with a podcast, you'll likely want to make sure you have the basic equipment and environment.
Computer: PC vs Mac?
This definitely doesn't matter, Zoom works on both PC and Mac, and even Chromebooks. In most cases, your choice of computer will not matter to the quality of recording
Webcam: Internal vs External?
Unlike Mac vs PC, this definitely matters. In most cases, your computer's internal webcam will not record good quality video. Even a cheap external webcam will get much better results. Here are a few recommendations:
- • Logitech C920: one of the most popular webcams, and the one I use personally for my own podcast
- • Razer Kiyo: has a built in ring light (good lighting definitely improves video quality), and is a great webcam for podcasting
- • Logitech Stream Cam: More expensive, but has built-in auto-focus, has a great lense, and also supports USB-C which is the default for newer computers
Microphone: Internal vs External?
Like with webcams, this definitely also matters. There are whole articles written about best microphones for podcasting, but here are a few recommendations:
- • JLab Talk: a basic but popular microphone that's great for beginners
- • Audio-Technica AT2040USB: a popular microphone for podcasters, a bit more expensive though, and the one I use personally for my own podcast
- • Rode NT-USB: a good middle ground between the above two options in terms of quality and price
Lighting
Making sure your environment is well lit is a very important to getting good quality video, but it also doesn't have to be expensive or complicated.
Here are a few recommendations:
- • If you have natural light (like a window), use that! Just make sure the light is coming from in front of you, not behind you
- • If you don't have natural light, consider putting a desk lamp behind the webcam to create a soft light
- • If you really want to go all out, consider a ring light, there are options for all budgets
The point is that you a need a moderate amount of light to shine on your face, and you don't want light coming from behind you, and you don't want to record in a low-light dark setting
Internet Connection
Hopefully this goes without saying, but you'll want to make sure you have a stable internet connection. You can just google "speed test" and Google will show button that says "run speed test"
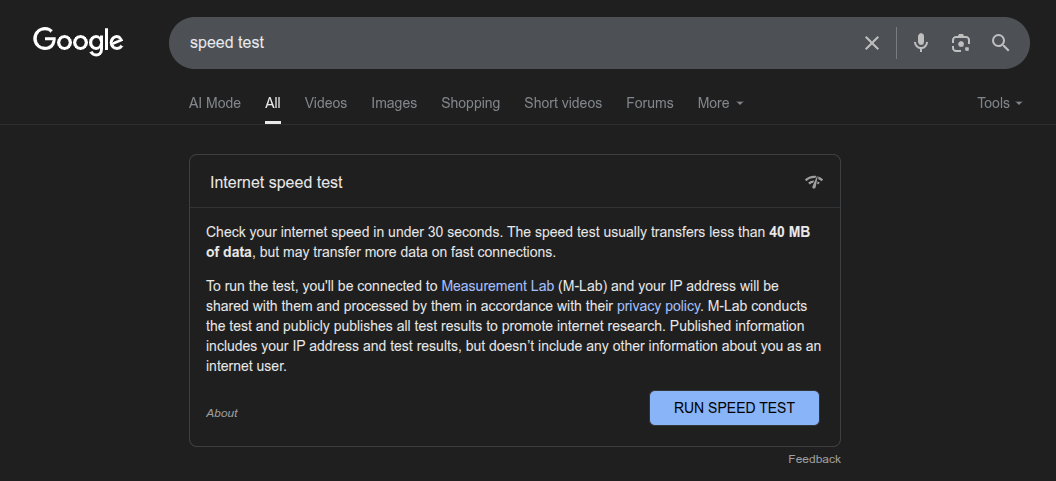
Just make sure that the number is above 10 MBPs for upload and download speeds and you should be good to go. If the number is below that, you may want to consider using a wired connection or getting a better internet plan, or even recording from a co-working space.
Recording Your Podcast on Zoom
Starting the Recording
Presumably you've already scheduled your meeting (which you can do so from the Zoom web portal or on the Zoom app) and you've invited your guests. Now you're ready to record!
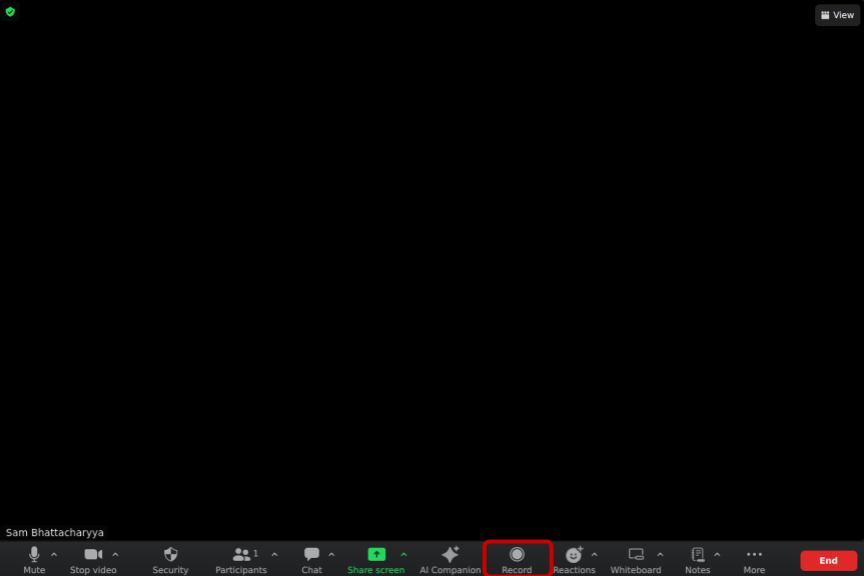
When you start the meeting, you'll see a toolbar at the bottom of the screen. Click on the "Record" button and you'll see a popup that says "Record to this Computer". Click on that and you're all set!
You'll see a recording indicator in the top right corner of the screen. Make sure all participants can see it.
During the Recording
Pro Tips for Better Results:
- • Keep gallery view active throughout the recording
- • Avoid screen sharing during main conversation (record that separately if needed)
- • If someone's connection drops, don't stop recording – modern editing tools can handle gaps
- • Keep the conversation flowing naturally – you can edit out technical issues later
Ending the Recording
When you're done, click the big red "End" button and choose "End meeting for all". This will stop the recording and then Zoom will show a popup that says "Recording saved to your computer".
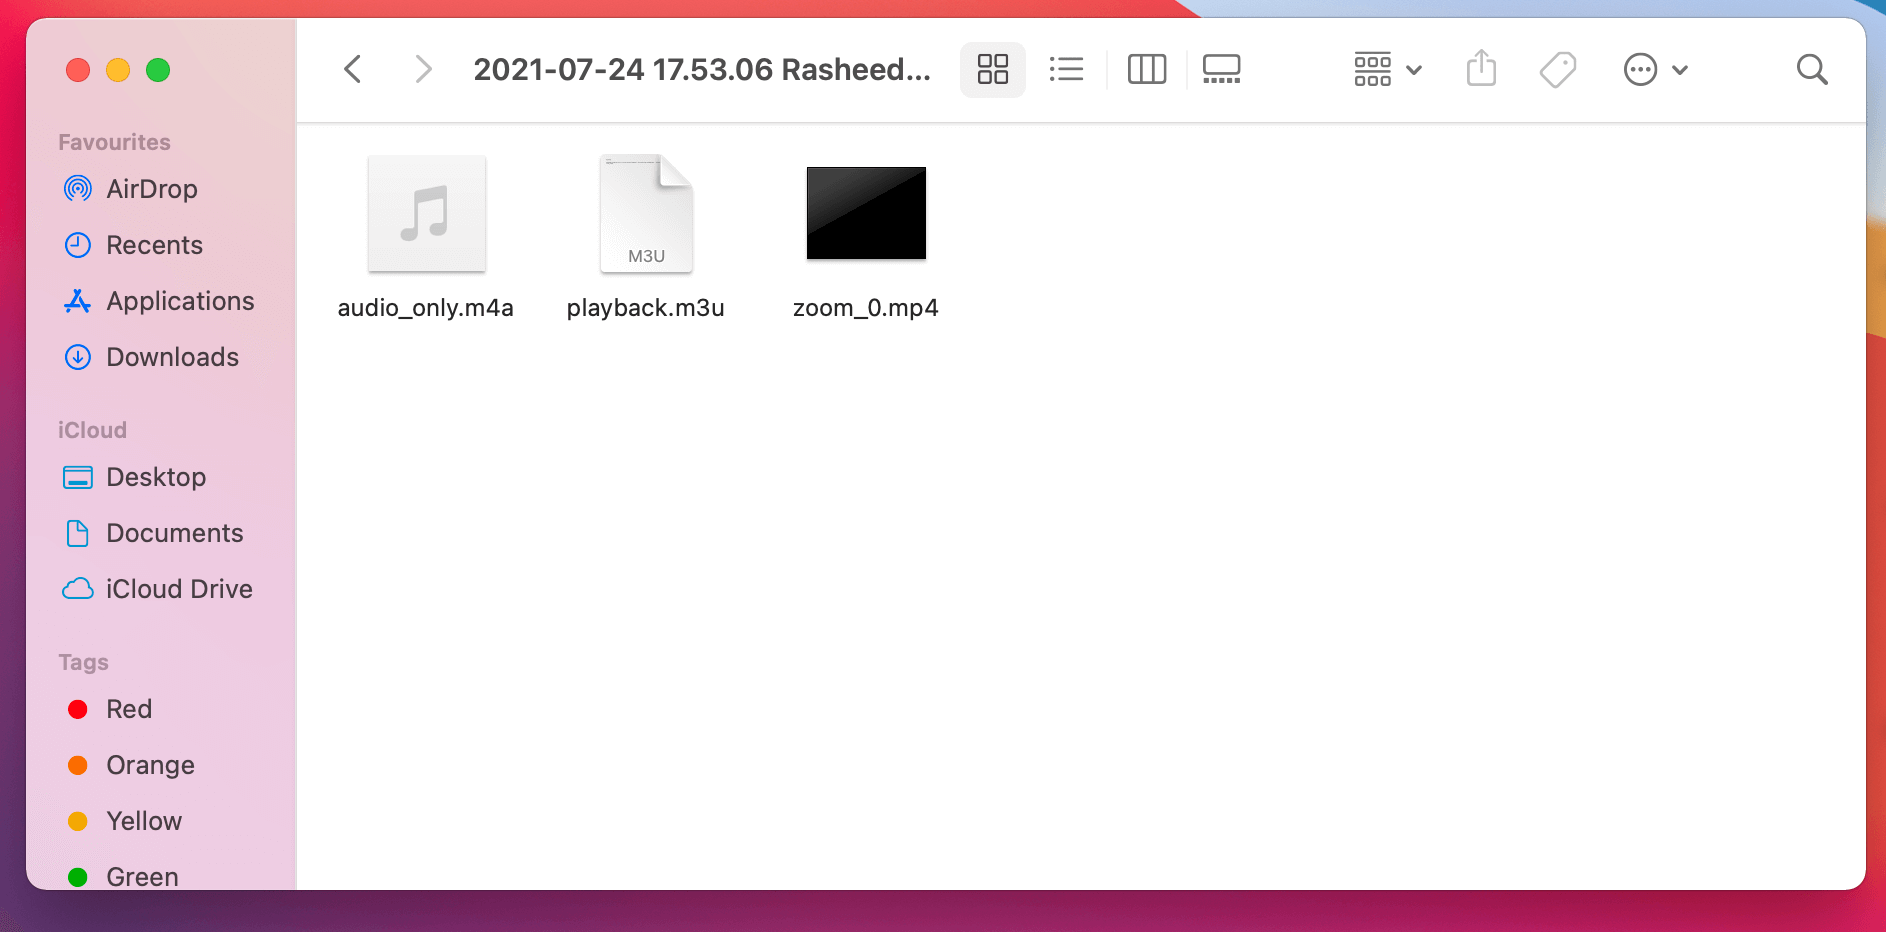
Zoom will then open up the folder where the recording was saved. You'll see a few files, including a video file and an audio file for each participant. You can send these files to your editor or post-production software to edit.
You'll get several files:
-
•
audio_only.m4a- Combined audio track -
•
video.mp4- Combined video with gallery view - • Individual audio files for each participant (if you enabled separate audio tracks)
-
•
chat.txt- Any chat messages during the recording
Editing Your Zoom Recording
This is where the magic happens – transforming your single Zoom file into a professional-looking video podcast. You have several options, each with different strengths:
Katana is designed for Zoom podcasts
Unlike more general purpose video editing software, Katana was built from the ground up to turn Zoom recordings into video podcasts.
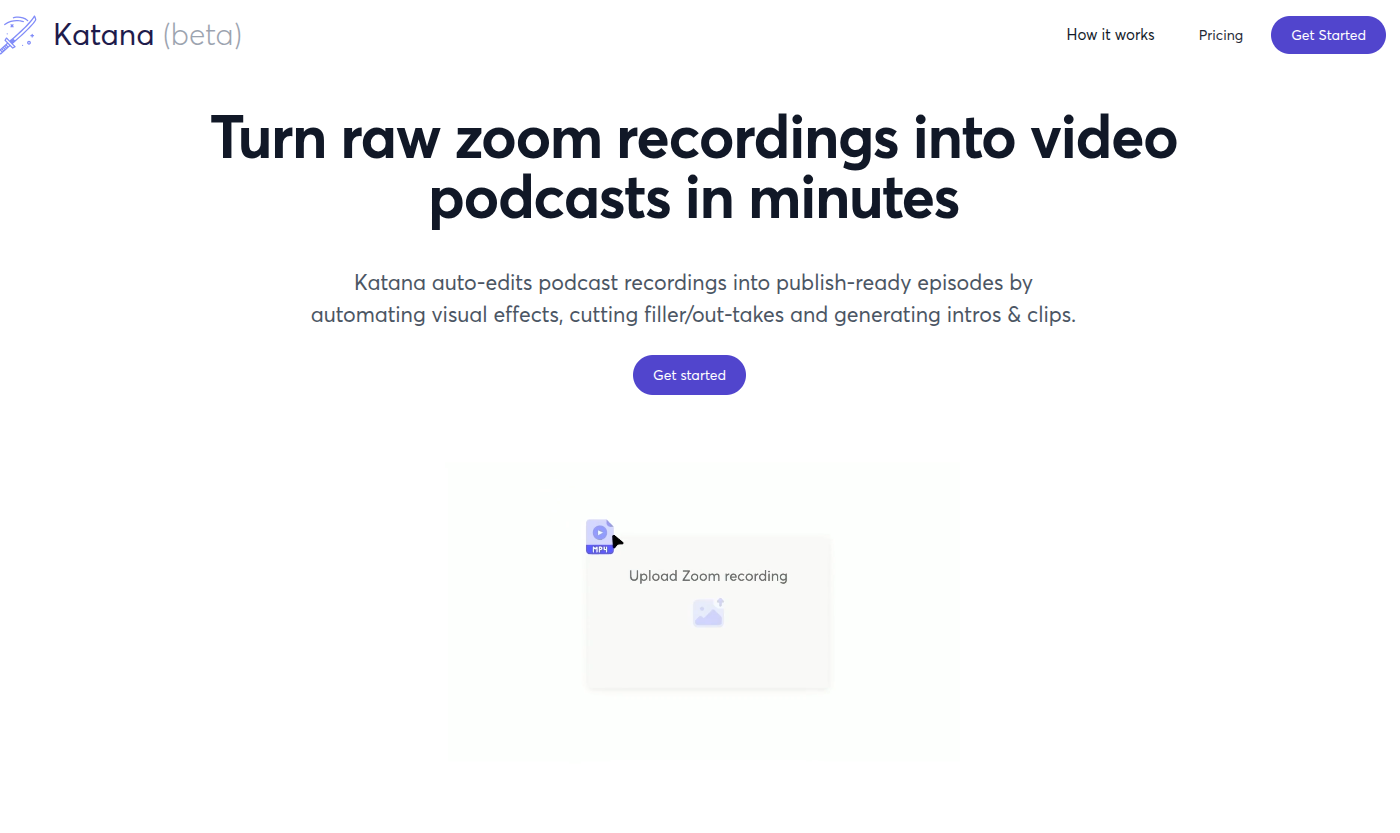
Here are a few key features that other editing options don't have that are critical for editing Zoom recordings:
Automatic multi-camera switching
Because Zoom returns a single video file, it is very difficult to seperate out the individual video tracks for implementing multi-camera switching (like you see in the example below).
While other editor tools like Descript have an "auto-multicam" feature, it requires you to have individual video tracks for each speaker, so it doesn't work with Zoom recordings.
Katana's AI on the other hand will not only automatically separate out the individual video tracks from a zoom recording, but it will also automatically implement multi-camera switching by default. You don't have to do anything, once your video is uploaded it is optimized with automatic multicam scenes out of the box.
Video quality enhancement
Zoom normally records video at 720p, and invidual speakers are compressed down to 360p, making the overall video quality not great.
Katana's AI will automatically enhance the video quality of your Zoom recording, making it look as if it were recorded in HD using professional recording software. There's no configution needed or buttons to press, Katana just automatically does this quality enhancement out of the box.
AI that edits for you
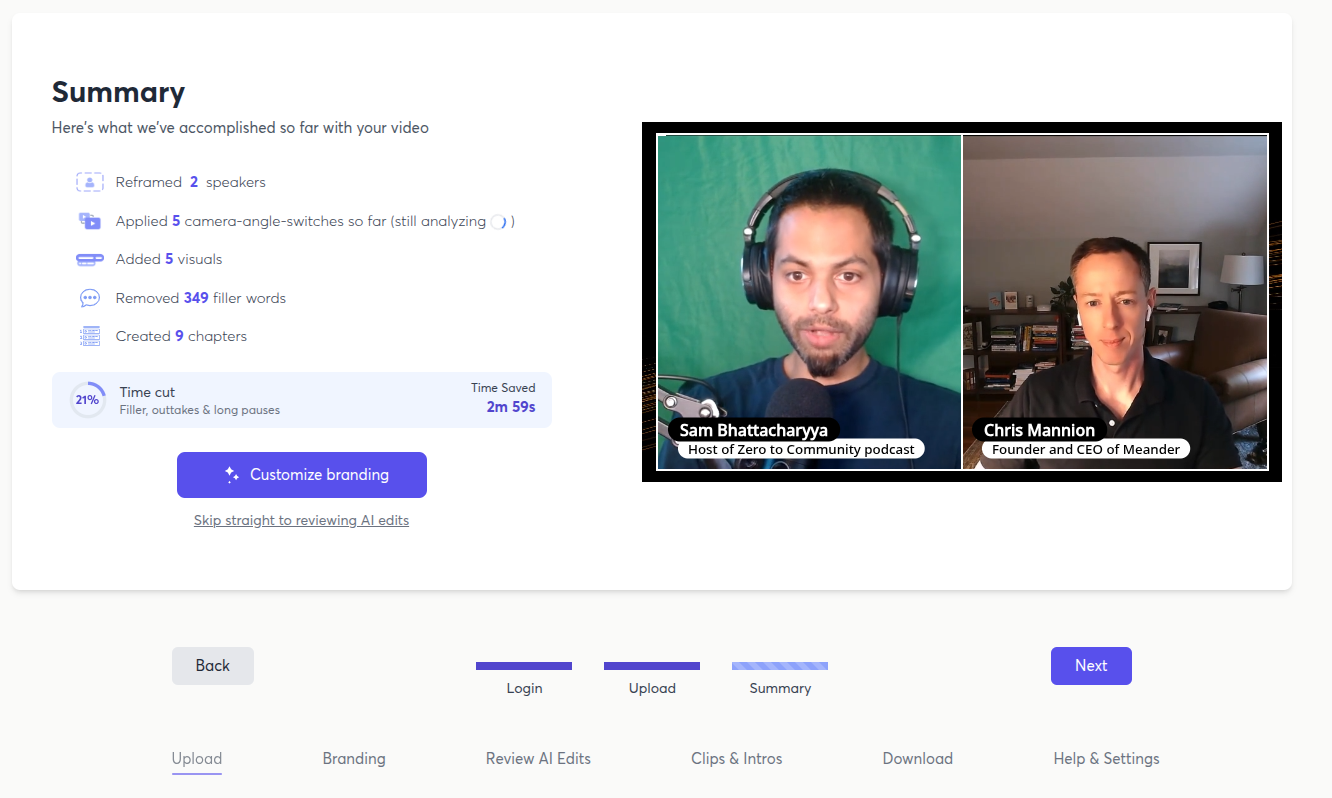
Katana will also identify filler words, outtakes, and automatically create visuals like name tags and graphics to make the video more engaging. It is much easier to create engaging video podcasts with without really doing any editing.
Katana isn't really an editor software in the traditional sense, Katana is like an AI that we trained to used video editing software by itself, and which was trained by professional video editors specifically for editing video podcasts. When you upload a recording, most of the low-level editing work is done automatically, and the rest of the 'editing' is basically setting up your branding, and choosing clips and auto-generated intros, so you're only looking at ~10 minutes to 'edit' a 1 hour video podcast.
If you are comfortable with multi-track video editing and managing timelines, and know exactly what you want to do, you will find Katana very limiting. But if you are just getting started and don't have much experience with video editing, Katana is probably easiest option to get something that looks professional.
How to use Katana
Katana is incredibly easy to use. Here's the quick step by step process:
- • Upload your Zoom recording to Katana
- • Our AI processes and automaticaly edits the video (usually takes 1-2 minutes)
- • Katana will walk you through reviewing the edits and customizing branding
- • You can optionally choose clips or auto-generate an intro
- • Export your finished video podcast
Overally, you can expect to spend less than 20 minutes from first upload to finished video podcast with Katana. Here is a video that shows the process:
Best For: Beginners and podcasters who want professional results with minimal editing experience, and who don't want to spend a lot of time editing, or those who regularly edit Zoom recordings and want to save time.
Not good for: Katana is not a general purpose video editor like the other options below. So while Katana is much easier and faster (~10 minutes vs 2 hours) for editing a professional video podcast, it really wasn't built for editing other kinds of content. If you are also aready an experienced video editor and want low-level control over the timeline and effects, you will find Katana very limiting
Try Katana for free: katana.video
Here are examples of video podcasts that were auto-edited by Katana:
Descript - Script-based editing with an AI copilot
Descript is an excellent transcript-based video editor that is great for general purpose editing of speech-heavy content like podcasts, tutorials etc..

Descript was originall built for scripted content, and their focus is on transcript based editing. Their marketing emphasizes "if you can edit a text document, you can edit a video"
Strengths:
- • Transcription-based editing (edit the text, edit the video)
- • Good overdub and voice synthesis features
- • An "AI copilot" that can lets you make changes to the video via chat prompts rather than traditional button clicks or timeline scrubbing
- • Solid noise reduction and audio cleanup
Limitations with Zoom recordings:
- • Can't separate individual video tracks from Zoom recordings
- • Video quality enhancement is limited
- • Multi-camera layouts require manual work
- • While it is simpler than Adobe Premiere, it still has a learning curve for most beginners
- • Their transcription quality has issues, so you will need to be careful when auto-applying "remove long gaps" or "remove filler words" features
Overall, Descript is a great tool for editing general purpose video content, and you can expect to spend 2-3 hours to edit a 1 hour video podcast.
Manual Workaround: You can use free.cropzoom.video to extract individual speaker tracks first, then use Descript's auto-multicam feature.
Best For: Professional video editors, and professional podcasters who do heavy content editing, and prefer control and precision over ease of use, as well as people who regularly edit many different types of video content, not just podcasts
Not good for: Beginners and podcasters who use Zoom as their primary recording tool.
DaVinci Resolve (Professional Video Editor)
DaVinci Resolve is a professional-grade video editor that's free and extremely powerful.

DaVinci Resolve is exactly the kind of software that you would normally think of as a professional video editor. It is a complete video editing suite that includes color correction, audio editing, and video effects.
Strengths:
- • Complete professional editing suite
- • Excellent color correction and audio tools
- • No subscription costs
Limitations with Zoom recordings:
- • Steep learning curve
- • Can't separate Zoom video tracks automatically
- • Requires significant time investment to learn
- • Video quality improvement requires manual work
Best For: Experienced video editors or those who want to learn professional editing and have the time to invest, as well as people making a lot of content, especially non-speech-heavy content where scene selection and artistic effects are important than making specific cuts based on what is being said.
Not good for: Beginners and content creators who are mostly making speech-heavy content like podcasts.
Publishing Your Video Podcast
Once you've edited your video, it's time to get it in front of your audience. Here's how to distribute effectively:
Video Podcast Platforms
YouTube (Essential):
- • Largest video podcast audience
- • Excellent discovery through search and recommendations
- • Upload your full episode plus shorter clips
- • Use clear thumbnails and SEO-optimized titles (Katana can help create these)
Video Podcast Directories:
- • Spotify (now accepts video podcasts)
- • YouTube Podcasts (integrated with main YouTube)
Audio-Only Distribution
Don't forget your audio-only listeners:
- • Extract audio from your edited video (tools like Katana or Descript will let you download the audio by itself as an mp3)
- • Upload to traditional podcast platforms (Apple Podcasts, Spotify)
- • Consider services like Buzzsprout or Spreaker for easy distribution
Social Media Clips
Create shorter clips for social media promotion:
- • 60-90 second highlights for LinkedIn and Twitter
- • Vertical clips for TikTok and Instagram Stories
- • Quote cards with compelling visual moments
There are many tools that can help you create social media clips from your video podcast. If you use a full-featured software like Katana or Descript, they will have clip generation built in.
Otherwise, here are some tools that can help you create social media clips from your video podcast:
- • Opus Clips
- • Swell AI
Why This Approach Works Better Than "Don't Use Zoom"
Here's what I've learned after helping hundreds of podcasters: the tools that tell you "don't use Zoom, use our platform instead" are solving the wrong problem.
The real challenges aren't with Zoom's recording capabilities – they're with the post-production workflow. Zoom recordings contain all the information you need for a professional video podcast; you just need the right tools to extract and enhance it.
When you use Katana with Zoom, you get:
- • The universal accessibility (everyone has Zoom)
- • A stable and reliable platform that just works and won't have connection issues
- • High quality video recordings through AI upscaling
- • Individual video tracks (something even dedicated podcast platforms struggle with)
- • Professional multi-camera layouts
- • All while working with a platform your guests already know and trust
It is the best of all worlds, there is no need to learn new recording software, no need to convince guests to try new platforms
Getting Started Today
Ready to create professional video podcasts with Zoom? Here's your action plan:
- Download Zoom if you haven't already
- Configure your recording settings following the guide above
- Record your first test episode with a friend or colleague
- Choose your editing approach – I recommend starting with Katana if you want the easiest path to professional results
- Create your first full episode and publish across multiple platforms
The beauty of this approach is that you can start with what you have today. No need to convince guests to try new platforms, no need to learn complex recording setups – just Zoom, the right settings, and a proper post-production workflow.
🎯 Ready to transform your Zoom recordings?
Try Katana for free and see how it transforms your Zoom recordings into professional video podcasts: katana.video